4 Best Solutions to Fix Grayed Out Folders Or Files on Mac
Tips & Tricks • February 17, 2020
Summary: This article will walk you through the best way to resolve and fix Grayed Out Folders Or Files on Mac and recover all your vital data with the help of a powerful data recovery software for Mac.
There is nothing to panic if you ever face such an issue, as this article will walk you through the 5 best solutions to fix Grayed Out Folders Or Files on Mac with the free Mac Data Recovery Tool!

Normally, the files and folders will display in black in Mac finder application, but when they become grey, it means that you can no longer access or perform any action on them. This issue happens when you are copying the file and folder to some other location, especially when copying from the network driver or copying to the network drives.
These greyed out folders or files will date back to 24 January 1984, a date when Mac was introduced. Read the below example to understand better:
When I was transferring my data, all of my photos and videos turned grayed out and unable to access! All the files are stated error with 24 January 1984. Why is this error happening? How to fix greyed out folders or files on Mac without losing or damaging my data?
Table of Contents
Why Grayed Out Files or Folders Occured on Mac?
When grayed out files or folders shown on your Mac, it means that some error is detected and the data becomes inaccessible. Some factors are contributing to this issue, such as:
- Faulty File System Entry.
- Power Failure.
- Hard Drive Formatting.
- Operating System Crash etc.
If you know these factors, you may know how to prevent folders or files from turning gray, Or if it already happened, don’t worry, you can fix grayed out folders or files issue easily and effortlessly with the below solutions.
Best Solutions to Fix Mac Folders or Files Grayed Out
Solution 1: Fix Mac Folders or Files Grayed Out with Xcode
The best solution to fix grayed out folders or files on Mac is by changing the date, but please note that this solution requires the users to download Xcode from the App Store, and then you can follow the steps below to fix the issue:
Step 1: Launch the Finder app and look for the grayed files and folders with 24 January 1984 Date Error.
Step 2: Now, navigate to Applications and launch the Terminal App.
Step 3: After this, type the command SetFile -d 17/02/2020/Path/to/grayed-out-folder/ and press Return.
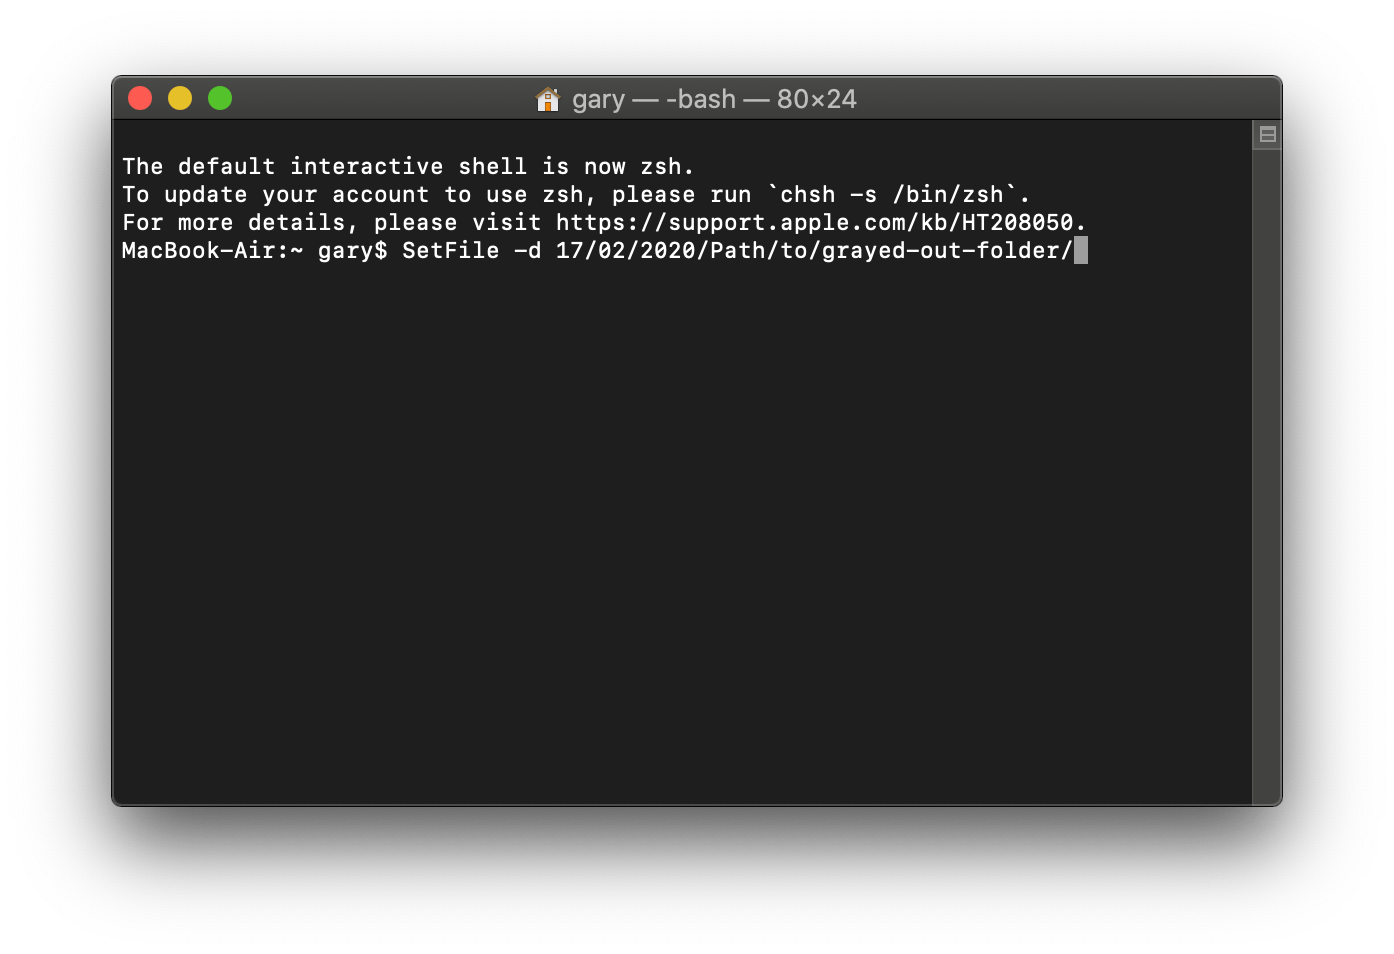
When you execute the above command, the date of the grayed out files and folders will be changed to 17/02/2020. You can also set the time and date according to your needs. Suppose that you are still struggling with this issue and not able to open your file or folder, then recover all your data from the grayed out file or folder by using the powerful free Mac Data Recovery Tool.
Steps to Recover Data from Grayed out Folders or Files
Data can be recovered easily from a grayed out folders on Mac by using the most powerful and reliable data recovery software like Bitwar Data Recovery Software for Mac. The software assures quick and efficient data recovery.
Follow the steps below and learn how to restore data from the Grayed Out Folders Or Files on Mac:
Step 1: Download Bitwar Data Recovery software for Mac operating system from our official website: https://www.365datarecovery.com/ by clicking on the Free Download button. After downloading, install the software in your Mac system.

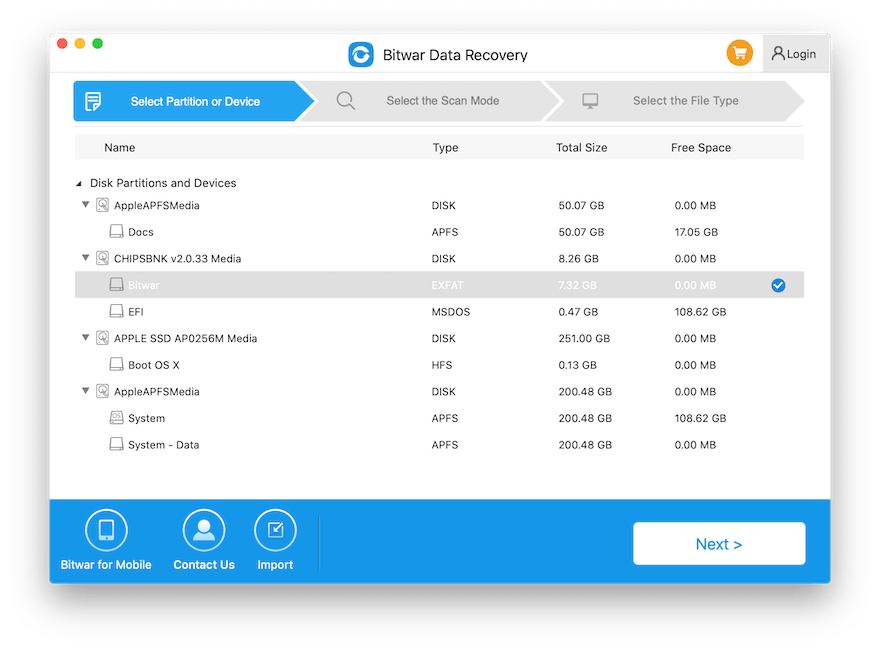
Step 2: Now, choose the Partition from the list of partitions, where you want to restore your data, followed by clicking on the Next button.
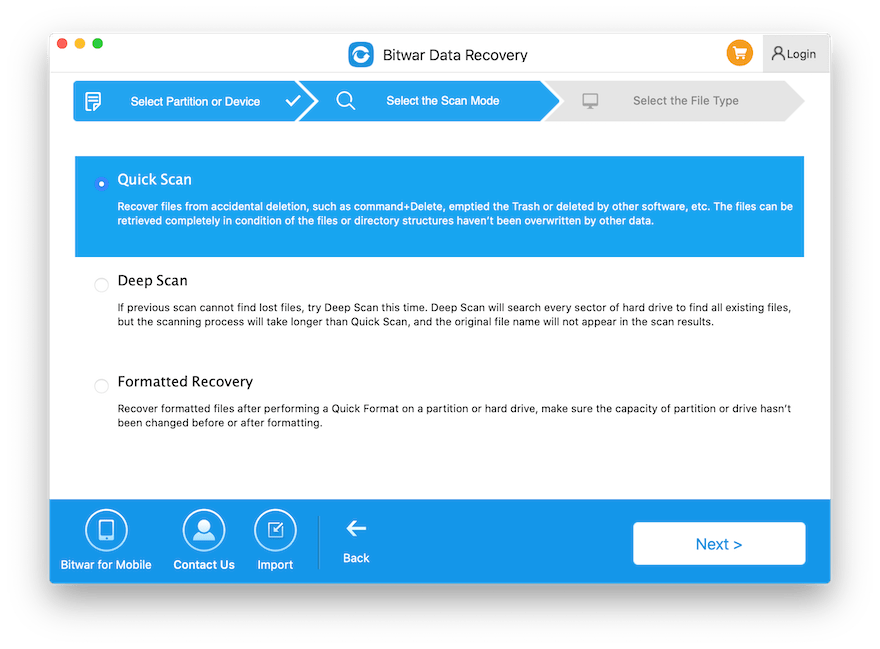
Step 3: You can choose Quick Scan at the beginning of the scan, and if Quick Scan doesn’t work to find the data, try with the Deep Scan next time.
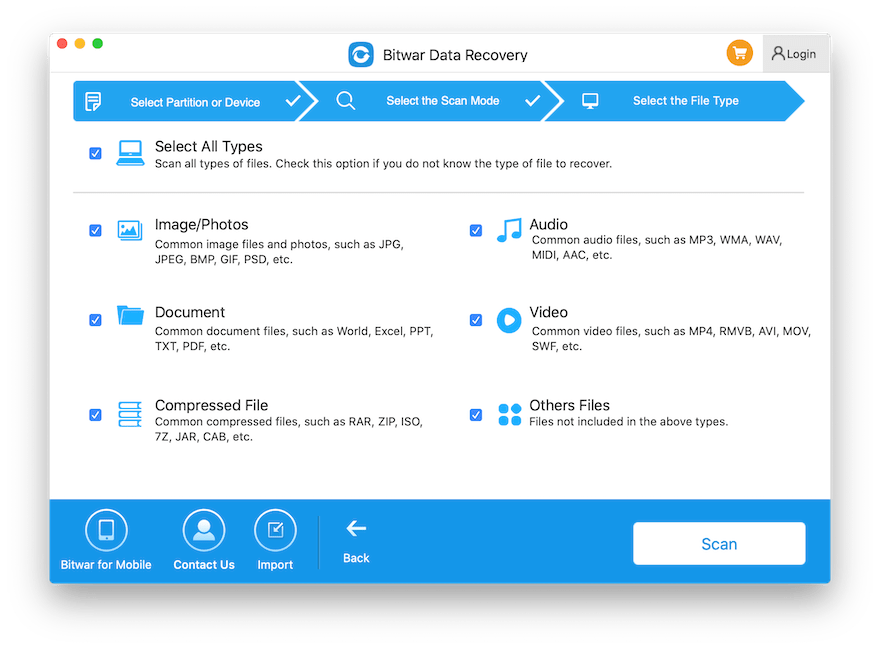
Step 4: After that, Select the file formats you want to recovery.
Step 5: Now, Check and Preview all the selected data that requires recovery and then click on the Recover button to start the data recovery.
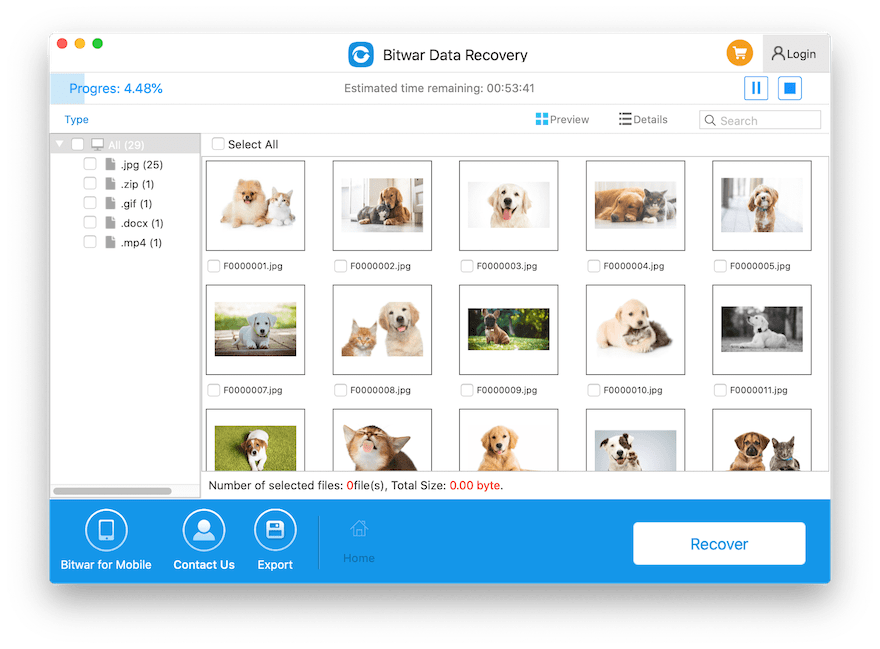
Important Note: We recommend that you not save the recovered data directly to the original location, but choose a new location to prevent data from being overwritten again.
![]()
About Bitwar Data Recovery for Mac
3 Steps to get back 300+ kinds of deleted, formatted or lost documents, photos, videos, audios, archive files from any storage devices.


Other Solutions Worth a Try
If you don’t like downloading Xcode from App Store, but choose to fix grayed out folder on Mac in an easier way, there are still some solutions that may worth a try.
Solution 2: Note App (Easeist One)
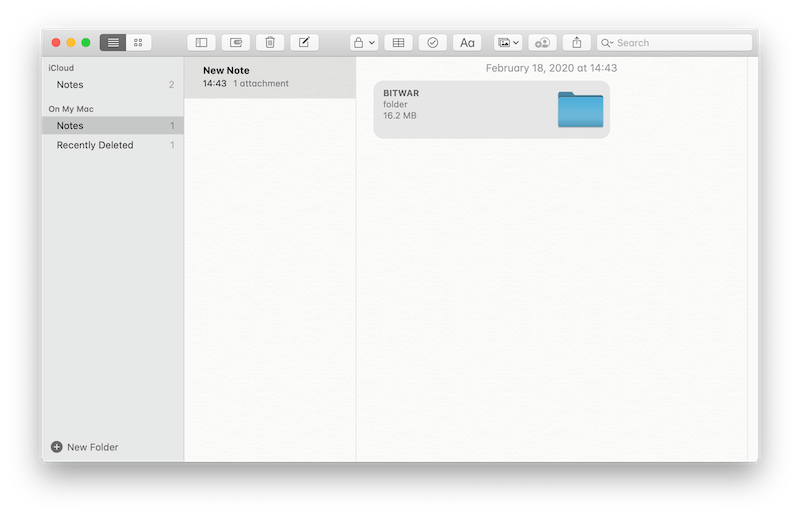
Step 1: Launch your Note App from the Application or Launchpad, and then click Create a Note.
Step 2: Navigate to Finder and find your grayed out folder, drag this folder directly on to the blank space of the created note.
Step 3: After a few seconds, you can then double-click this folder and Bingo, there are your files, you just need to copy the files out from this folder to another new one. Done!
Solution 3: Make Alias (Also a Quick Fix)
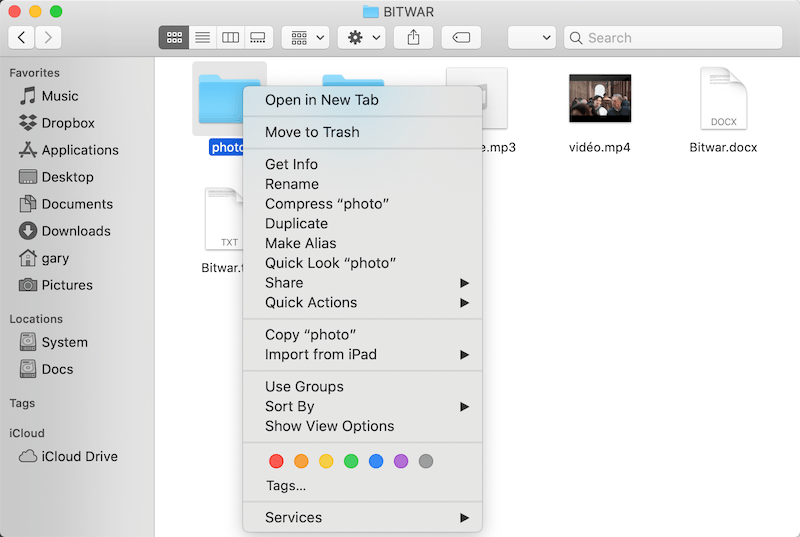
Step 1: Navigate to the location that has the grayed out folder and then right-click on it.
Step 2: Choose Make Alias and now you can click on this Alias Folder to get into the grayed-out folder.
Step 3: Copy all of the files from the grayed out a folder to a new one, Done! (You may need to enter the Admin password to be allowed to copy the files).
Solution 4: Open Grayed Out Folder directly Using Terminal App
It’s very easy to use Terminal to open the grayed out folder following with steps below:
Step 1: Launch the Terminal App by typing Terminal after opening the Spotlight dialog box (Command+ Space), then hit on Return.
Step 2: Type Open in the Terminal app window and then hit on the Space, now drag the grayed-out folder directly on to the Terminal window.
Step 3: You will see the folder address has been populated automatically with the full path. (E.g. /Users/gary/Downloads/Bitwar)
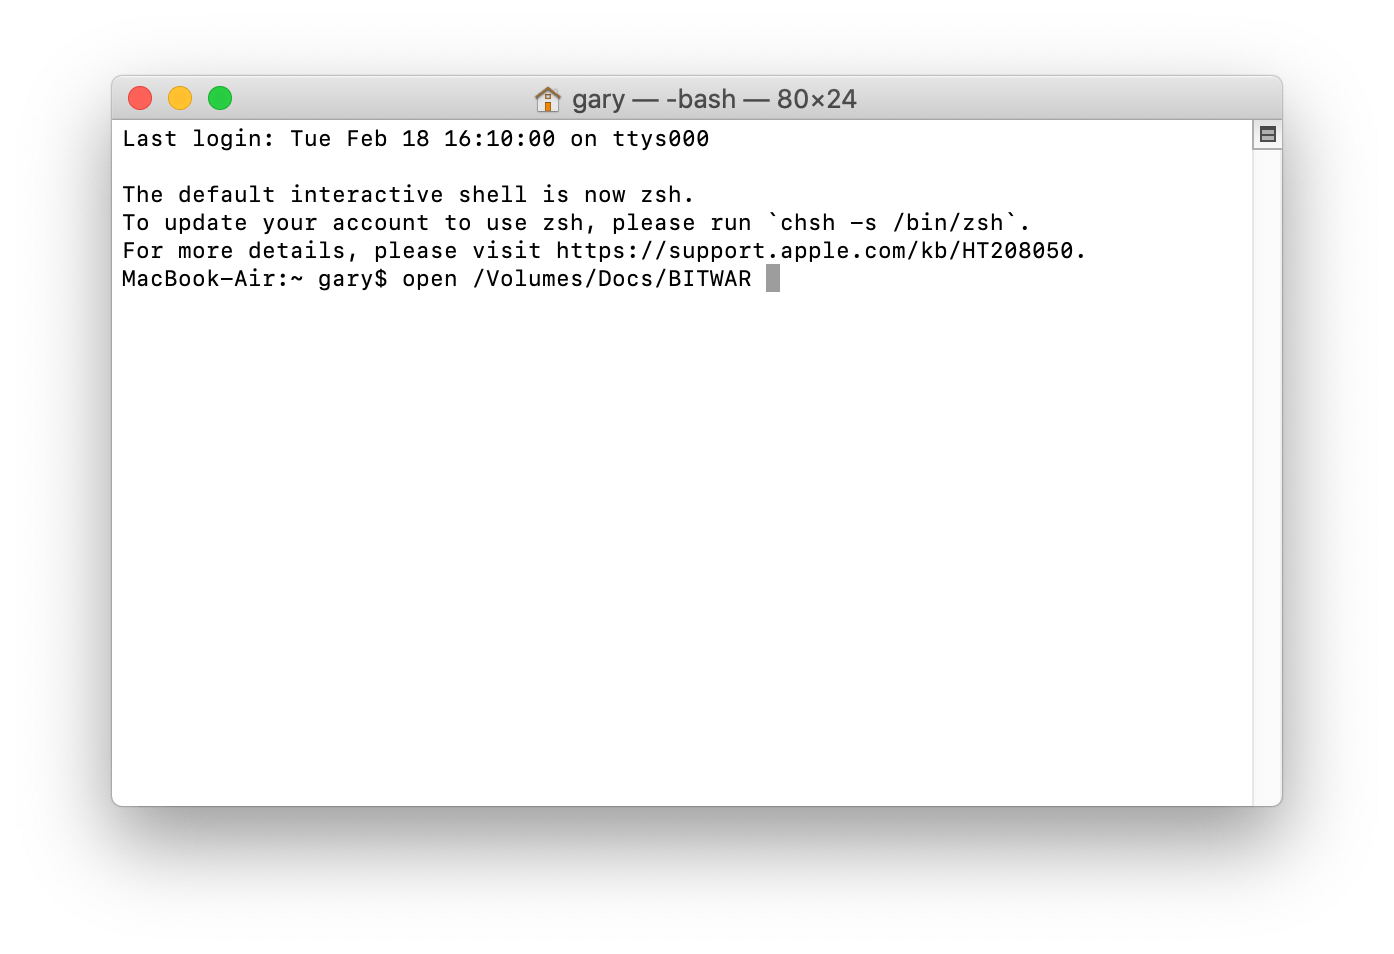
Step 4: After that, hit on the Return, you’ll see the grayed-out folder pops out, then transfer the files to another new folder. Done!
Wind-It Up!
When grayed folders or files are shown on your Mac, the date is set to 24 January 1984, i.e., it is when the Macintosh was introduced. In this situation, you will be restricted to open or access the data stored in the grayed out file or folder. Fortunately, the problem can be fixed easily with 5 solutions mentioned above.
In case you are still not able to address this concern with the help of the Terminal app or others, then we recommend using Bitwar Data Recovery Software for Mac to recover all your data within the affected folder or file. Besides, the program can do a great job to help recover deleted, formatted and lost document, video, audio, image and archive file from any of your storage device, if you are interested, please refer to the homepage to learn more about Bitwar Data Recovery.
Read More

The solution works for me! Thanks!