How to Stop Trash Deleting Files Immediately on Mac?
Tips & Tricks • February 12, 2020
Summary: This article will introduce you to the best solution to fix and repair trash from deleting files immediately on Mac and recover all your essential data using the best Mac data recovery software.

Do not worry! This article will show you the most effective and tested solution to fix it up and recover all your essential data using the best Mac data recovery tool such as the Bitwar Data Recovery Software for Mac.
Table of Contents
This isn’t a Problem Only Happens to You
Trash deleting files immediately on Mac is a very common issue faced by multiple Mac users. Have a look at the below concern which raised by one of the Mac users to understand better about the issue:
I have a big problem that after updating to macOS X Mojave: when I was trying to delete some files from the hard drive, my trash bin deletes these files immediately. And even when I tried to drag files directly to the trash bin, it noted to me that ‘Are you sure you want to delete xx.docx? This file will be deleted immediately.’ It seems that all of the deleted files are deleted directly without sending to Trash, what can I do to stop Mac trash deleting files immediately?
The latest Mac OS X is equipped with a feature to delete a file/folder bypassing the trash can immediately. This feature works by circumventing the trash rather than waiting for the user to remove files. This feature deletes files instantaneously, thus making delete functions work faster. This feature is a good way if you want to remove your data from Mac right away, without emptying the trash folder manually, it skips the trash function and removes files at the same time.
However, it becomes annoying if someone needs to keep the deleted files inside the Trash just want to make sure not to delete some important documents, videos, audios accidentally. Before knowing the solutions to overcome this issue, you may probably want to know why this happens.
What’s Cause the Issue?
As per the explanations, the file permissions linked to trash are out of whack. Therefore, restricting OS X to add/write new files into the trash. That is how the deleted files/data are bypassing the trash and get deleted immediately.
Then, we can we do? Relax, before moving on to the steps to execute the Terminal command to fix this issue, first, we need to recover all your deleted data if you urgently need it by using the Mac Data Recovery Software.
How to Recover Data when Trash Deleting Files on Mac?
Follow the given simple steps below to restore your data:
Step 1: Download Bitwar Data Recovery Software for Mac from the homepage: https://www.365datarecovery.com/ by clicking on the Free Download button and then install the software in your macOS.

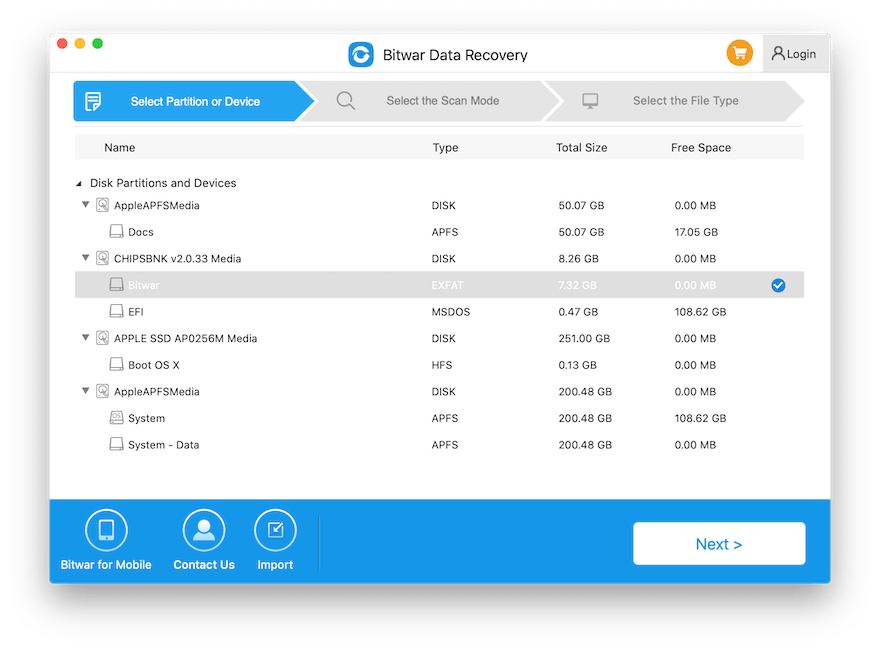
Step 2: Launch the Data Recovery Software and select the drive/partition where has your lost data and followed by clicking on the Next button.
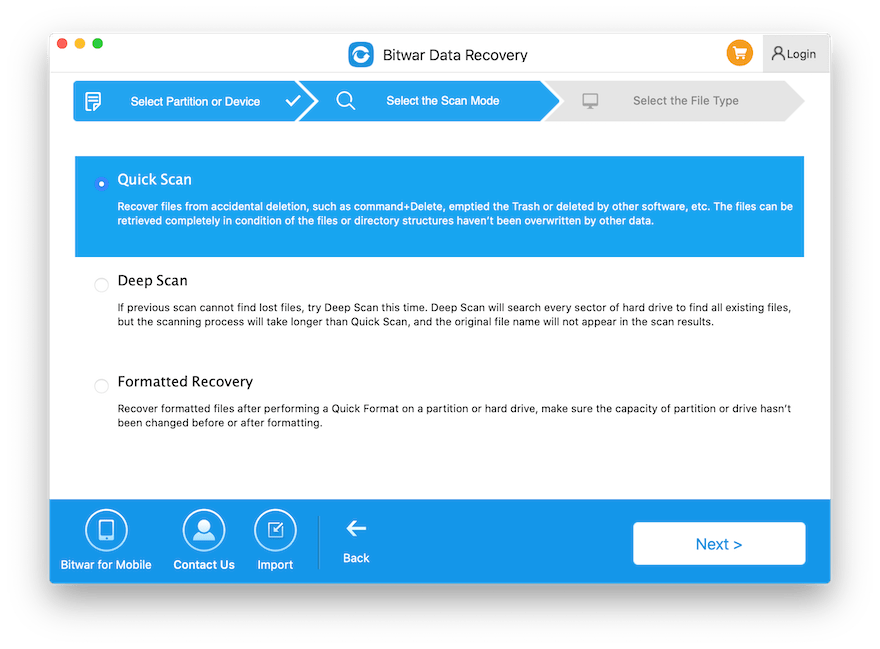
Step 3: Select a recovery mode in this step, we recommend you select Quick Scan for the first time, however, it Quick Scan mode can’t work to find your data, try with Deep Scan mode next time.
Step 4: Check/Preview all your selected data that requires recovery and then click on the Recover button to start recovery.
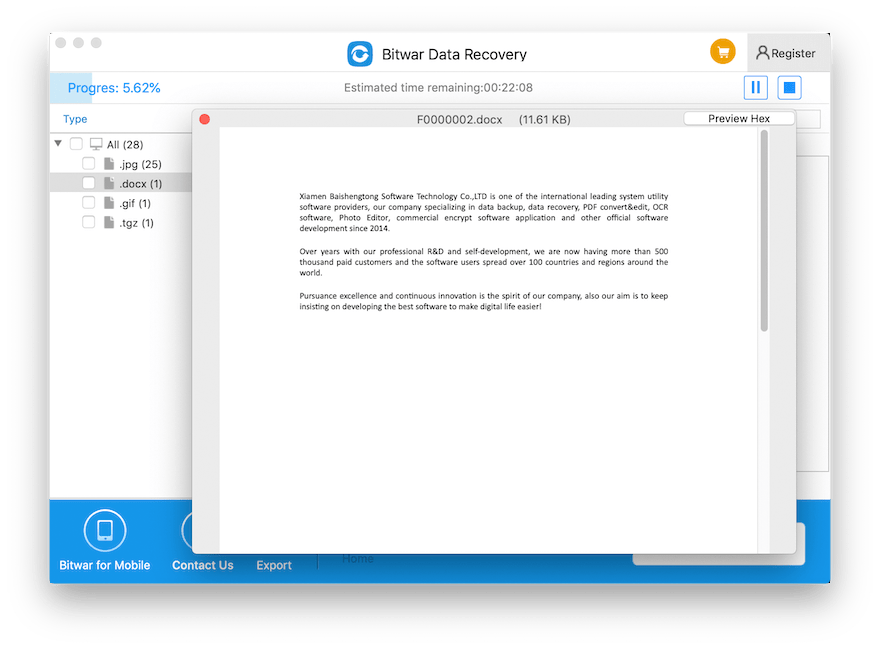
Note: Once data recovery is successfully finished, save all the recovered data at some safe location instead of the original file location.
Important Note: Once data recovery is successfully finished, Remember to save all the recovered data at a new safe location instead of the original file location.
Why Use Bitwar Data Recovery Software for Mac?
Bitwar Data Recovery is efficient and dynamic recovery software that thrives on delivering a complete recovery solution without causing any damage or harm to the data (It works under read-only recovery mode).
You can recover the data such as documents, videos, audios, photos easily and effortlessly with about-mentioned steps from any device such as Mac internal & external hard drive, USB flash drive, SD memory card and any other storage devices, no expertise skills needed! If you are interested to know more about the Bitwar Data Recovery for Mac, please refer to the homepage: https://www.365datarecovery.com.
Now, as we have successfully got back the deleted files, we can continue to stop trash deleting files immediately on Mac using the mac internal utility tool: Terminal. I’ll attach the screenshots for you to help knowing better the solutions.
How to Stop Trash Deleting Files immediately on Mac?
To be frank, Mac users need to be very careful while processing and executing the terminal command, as any mistake will lead to the deletion of other files on your system as well.
Thus, we recommend taking a backup of your data before using the Terminal command. You can conveniently create a data backup on your Mac using Time machine.
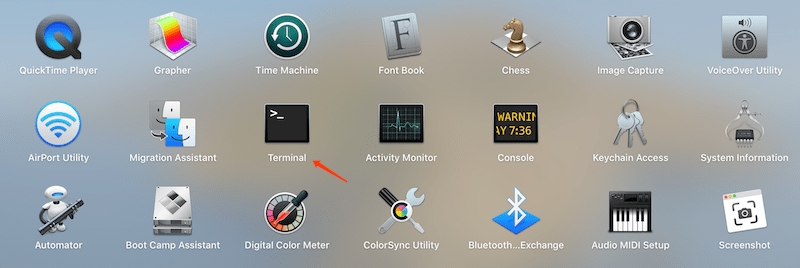
Step 1: Open the Launchpad and navigate to Terminal. You can also using Command + Space to launch Spotlight and then type: Terminal to open it.
Step 2: In the Command Prompt, type the command Sudo rm -ri ~/.Trash and press on Return.
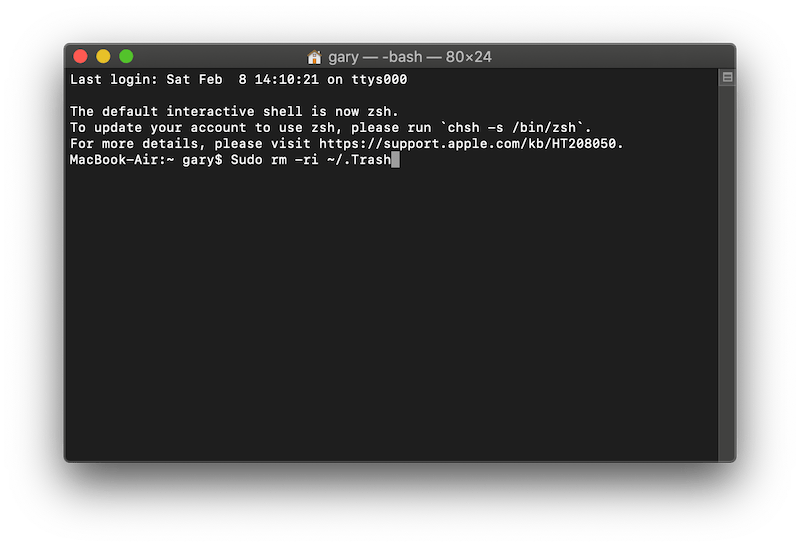
Before executing the command, you will be asked to enter your account’s password. After this, you will be prompted to examine any files/folders in the trash (.Trash folder), following the. Trash folder itself, type Yes, and press return at every prompt.
Step 3: Now, sign out of your OS X account and sign back in.
After executing the Terminal command, the trash deleting files immediately on Mac should no longer be there as the OS X will work to create a New Trash Folder with all the correct permissions.
![]()
About Bitwar Data Recovery for Mac
3 Steps to get back 300+ kinds of deleted, formatted or lost documents, photos, videos, audios, archive files from any storage devices.


Bonus Tips:
If the problem happened to you isn’t the Trash deleting the files immediately, but instead of automatically emptying the Trash after a period, or there’s no warning to be prompted to note you that: Are you sure you want to permanently erase the items in the Trash? You can follow the below steps to fix the issues.
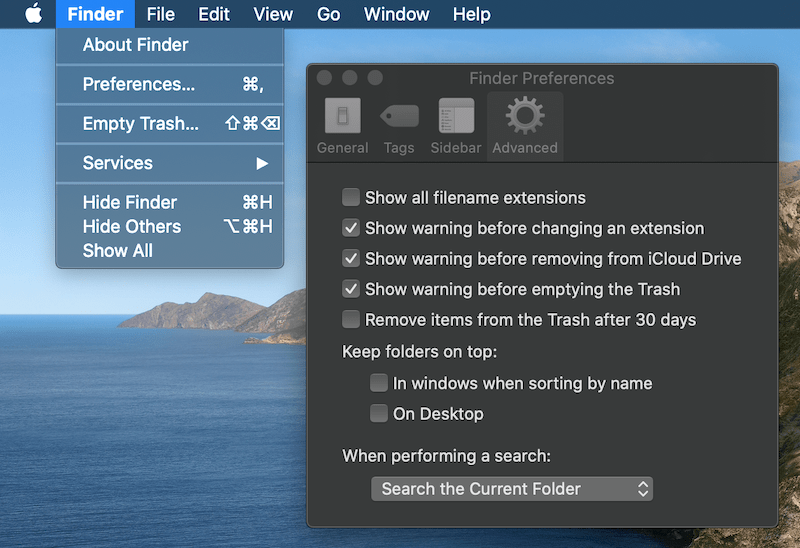
Fix No empty warning Sign:
Retun back to your desktop, and then click Finder > Preference > Advanced > Show warning before emptying the Trash > Check
Fix Trash empty the files automatically issue:
uncheck the option: Remove the items from the Trash after 30 days in the Advanced setting.
Try It Now!
It can be extremely frustrating when you need any file from your trash folder, but it has been deleted immediately on Mac. This happens when the file permissions given to trash are out of whack. Thus, not letting OS X add/write new files into the trash. You can easily stop trash from deleting files immediately on Mac with the help of Terminal command, however, be very careful while you execute it, as any incorrect step can lead to deletion or loss of other files or data in your Mac system.
We suggest taking data backup in such a case to avoid and data loss. Additionally, you can recover all your files lost due to this issue with the help of reliable and powerful recovery tool such as Bitwar Data Recovery Software for Mac.

Michael says: