7 Practical Solutions to Resolve ‘Mac External Hard Drive Sleep’ Issue
Tips & Tricks • August 7, 2020
Summary: This article below will get user to be familiar with some of the effective ways to resolve the ‘Mac external hard drive sleep‘ issue and retrieve all the data by using Bitwar Data Recovery Software for Mac!

![]()
About Bitwar Data Recovery for Mac
3 Steps to get back 300+ kinds of deleted, formatted or lost documents, photos, videos, audios, archive files from any storage devices.


So, if you have encountered this problem, do not worry as we have some of the most effective solutions, which will help to resolve the ‘Mac External Hard Drive Sleep‘ issue by going through the steps below carefully right away!
Table of Contents
Practical Solutions to Resolve ‘Mac External Hard Drive Sleep’ Issue
Solution 1: Reconnect the Hard Drive
Try to reconnect your external hard drive to your Mac system, which shall be visible in the finder after reconnecting. Then, continue accessing the storage device to read and write!
Solution 2: Reboot System
Suppose that reconnect hard drive doesn’t work, you can reboot the Mac system with the hard drive attached to repair and fix misconfiguration and other errors. By doing so, it will activate the external storage device for further use.
Solution 3: Check MacOS Sleep Settings
Step 1: Go to System Preferences from the Apple menu, followed by going to the Energy Saver.
Step 2: In the Energy Saver window, unselect the Put hard disks to sleep when possible option by going to the Battery/Adapter panel.
Now, the hard disk will get activated, and this setting also will not have any impact on the SSD due to no moving component.
Solution 4: Reinstall Hard Drive Software
Sometimes, the Mac OS doesn’t work correctly due to hard drive software being incompatible. In this case, uninstall the driver from your device and download the latest and compatible driver might help solve the ‘Mac External Hard Drive Sleep‘ issue!
Solution 5: Upgrade to the Latest OS
Step 1: Navigate to the Apple menu, go to System Preferences, and then to Software Update.
Step 2: Upgrade the OS if updates are available.
For macOS Sierra, High Sierra, and older versions, follow the steps below:
Step 1: Open App Store and proceed to Updates from the toolbar.
Step 2: Click on the Update All button to download and install the updates.
For macOS Snow Leopard and Lion, follow the steps here:
Step 1: Launch the Apple Menu and select Software Update.
Solution 6: Fix the External Hard Drive
Follow the steps below to fix the ‘Mac External Hard Drive Sleep‘ issue:
Step 1: Launch Spotlight by pressing Command + Space bar.
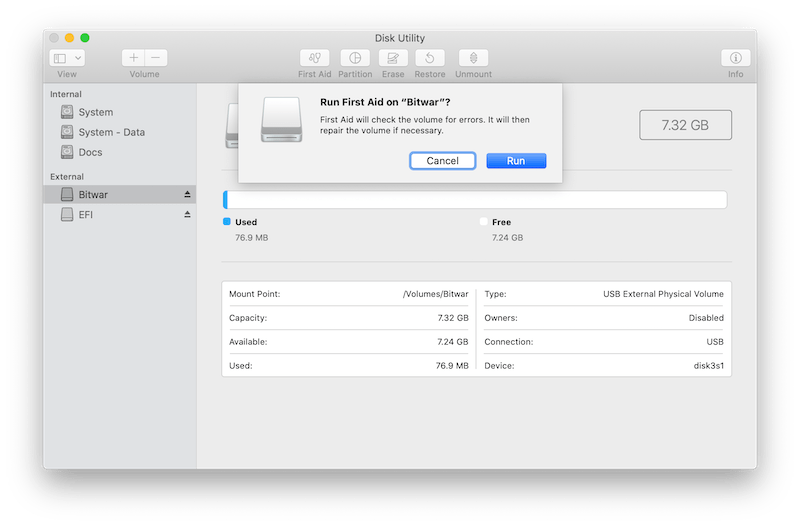
Step 2: Write Disk Utility and press on Return to launch Disk Utility.
Step 3: From the left panel, select the external hard drive and click on the First Aid.
Step 4: Select Run to start the verification and repair procedure.
You also can use fsck or file system consistency check:
Step 1: Press Command + S keys immediately after restarting your system.
Step 2: Type in the command /sbin/fsck –fy: in the command line and then press on Return.
Step 3: Wait for the command line to finish the repair process.
Step 4: Run the same command until your drive check comes OK.
Step 5: After this type in reboot followed by pressing Return.
Before we proceed to our next and last solution to resolve the ‘Mac External Hard Drive Sleep‘ issue, it is essential to create a backup of all your data stored in the hard drive as this solution can lead to data loss.
For any backup and recovery related concerns, we highly recommend a reliable and quality data recovery software – Bitwar Data Recovery Software for Mac as it provides 100% clean recovery. Additionally, this recovery tool is extremely user friendly and delivers effective recovery results.
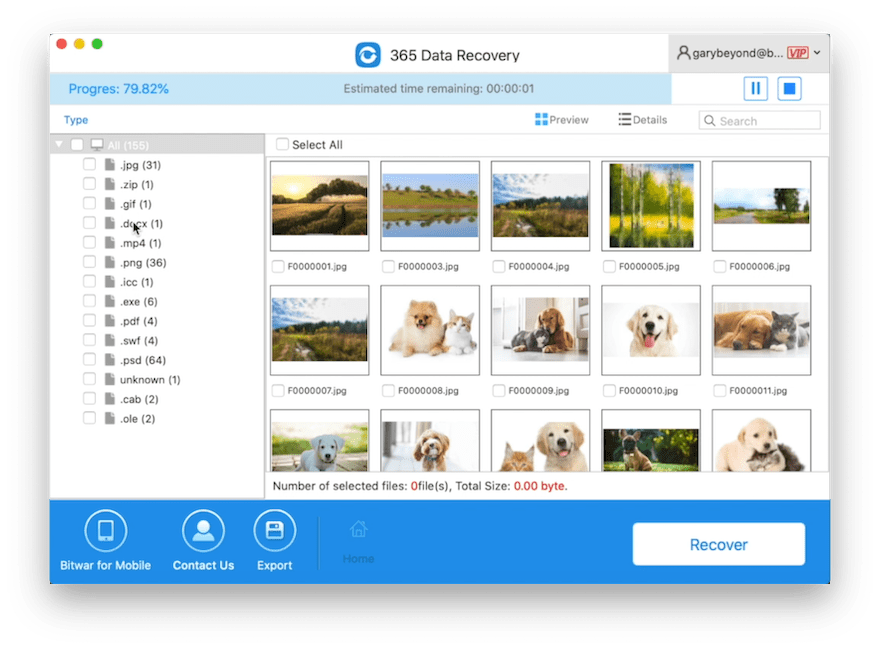
Recover Data using Mac Recovery Software
Steps to back up data by using Bitwar Data Recovery Software for Mac:
Step 1. Download the data recovery software from the official site: https://www.365datarecovery.com/.

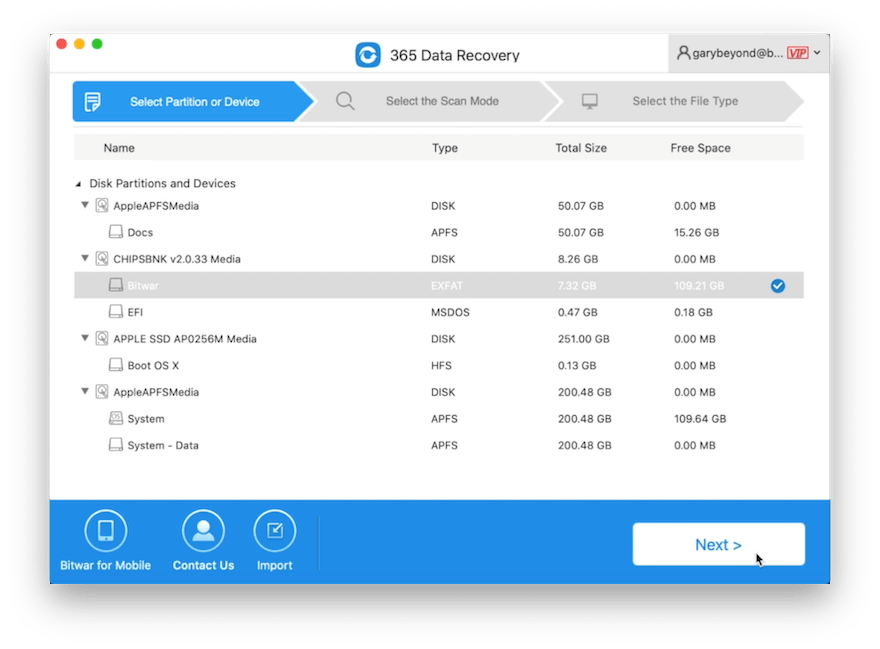
Step 2. Launch the software and choose the hard drives. Then, proceed to the Next button.
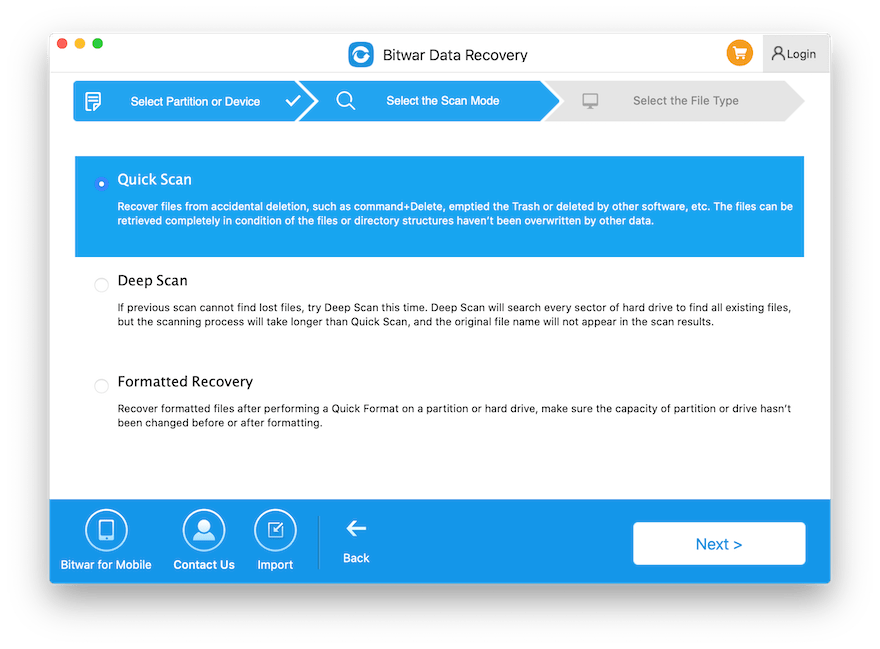
Step 3. Choose your preferred scan mode and click on Next to continue.
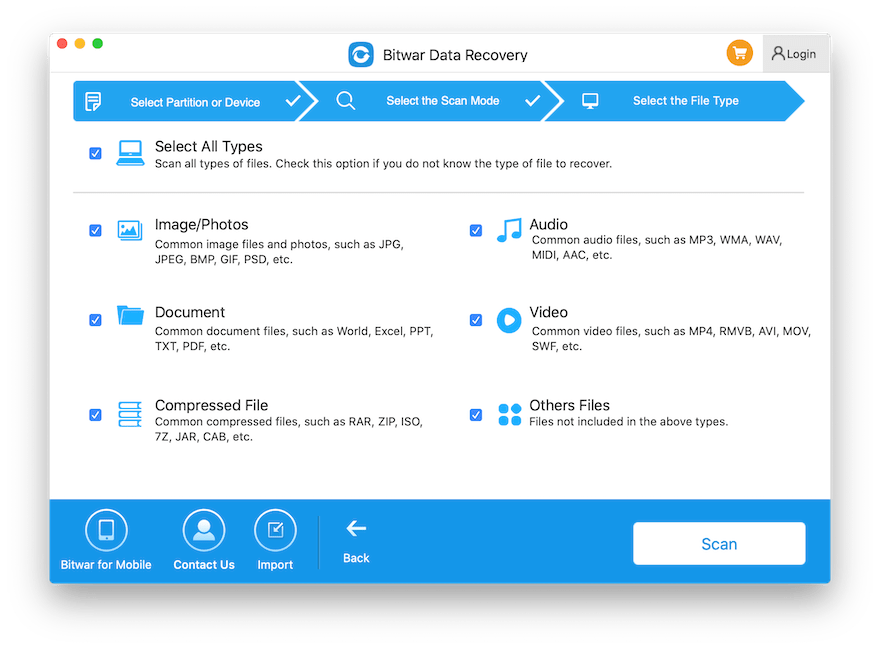
Step 4. Select the File type and followed by the Next button again.
Step 5. Preview and Click the file that needs to backup. Then, hit on the Recover button to start the process.
Valuable Advice: When the file is restored from the hard drive, make sure to keep it at a different partition or drive to prevent data overwritten.
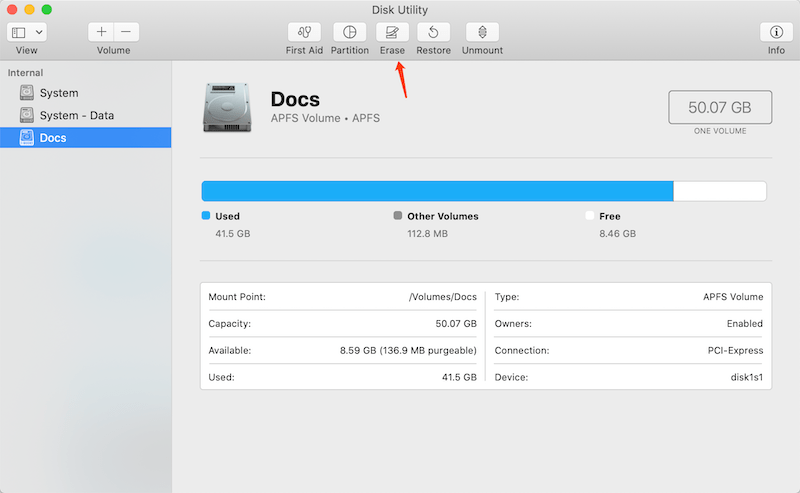
Solution 7: Format the Hard Drive
Once you have successfully created the backup of your essential data, proceed to format the hard drive using Disk Utility.
Step 1: Launch Disk Utility.
Step 2: From the panel on the left, click on the external hard drive and then go to the Erase tab.
Step 3: Enter the details like name and format, followed by pressing the Erase option.
Step 4: Once the process is complete, Save the backed-up data to the hard drive.
Resolve-It Now!
The ‘Mac External Hard Drive Sleep‘ issue occurs when the OS tries to save energy by switching the hard drive’s motor off while no read and write operation is active. There are many useful solutions to resolve this problem by following the solutions above and don’t forget to create a back-up for all the essential data by using trustworthy and efficient Bitwar Data Recovery Software for Mac!

Michael says: